
This article is a followup to Part 2 in that I am working with the same type of information but have found an even more convenient way to manage it.
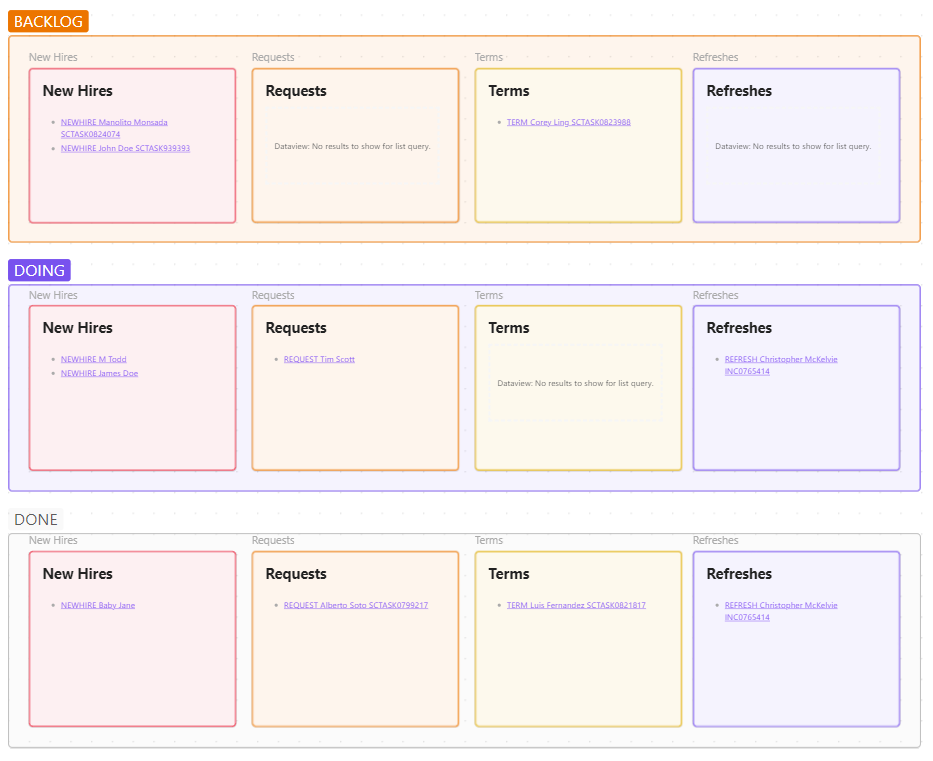
If you go back to Obsidian Part 2 briefly, you will see a Dashboard that shows the type of work to be done categorized by its status of Backlog, Doing or Done.
While the Dashboard auto updated as notes (tickets) were entered, there was no management abilities in it. For example, I couldn’t change the statuses by dragging them around as is possible with a traditional Kanban board.
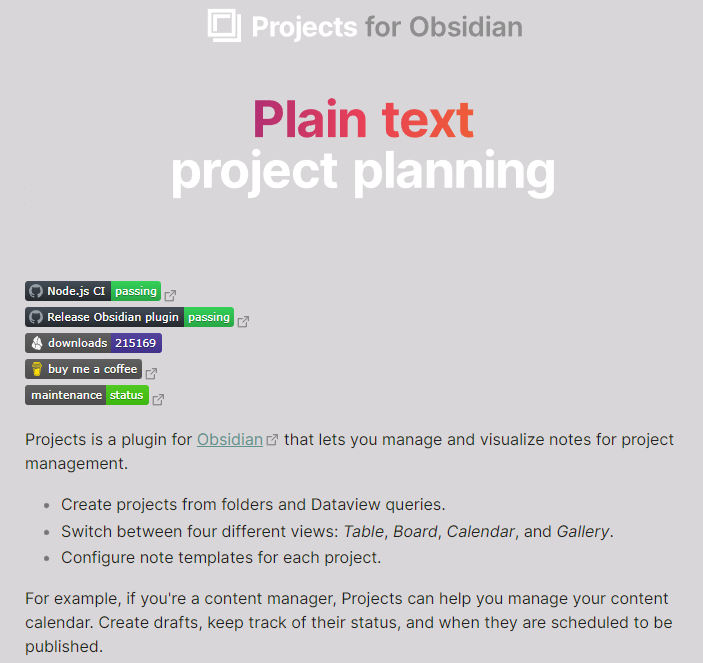
After watching some others using the Projects plugin, I decided to look at this again. Below is the intro page for Projects documentation. Except for attachments to notes, which can be, pictures, videos, etc., everything else stored by Obsidian in plain text files. Thus, Projects manages and presents those files via the text, date and other fields that are in their frontmatter section.
In Part 2 on ways to use Obsidian, I used some simple Dataview queries to create lists of open items based on type of work (New Hires, Requests, Refreshes and Terms) and their status (Backlog, Doing and Done). Using these tags in the work notes, the Dashboard was automatically updated.
Clicking on any item inside the Dashboard would open up its related note for editing. While this looks great, I realized after using the Projects plugin, that is takes more steps to update the status of the work. And there is no calendar for viewing and setting the due dates for notes. The Projects plugin solves all of these issues.
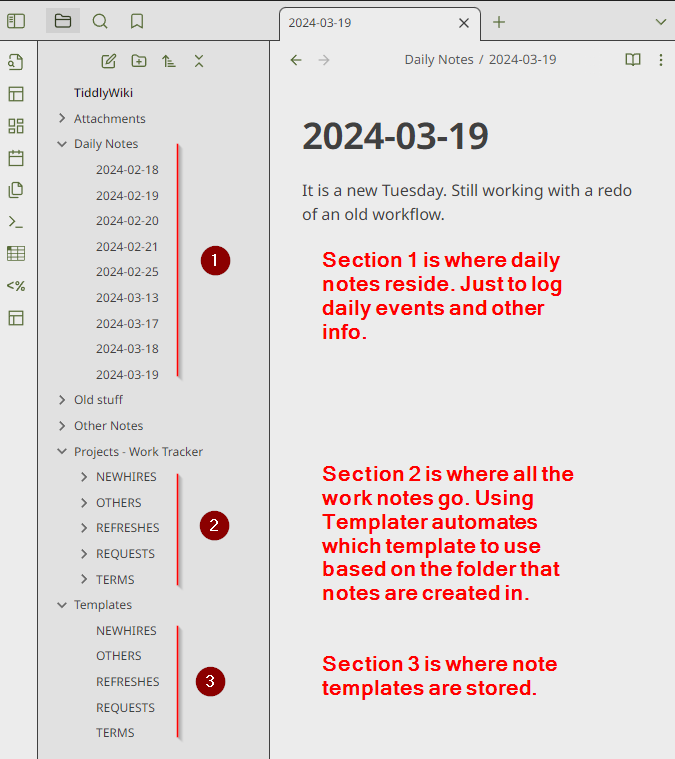
Here is the folder layout for my usage of the Projects plugin.
When a new project is created these options are available:
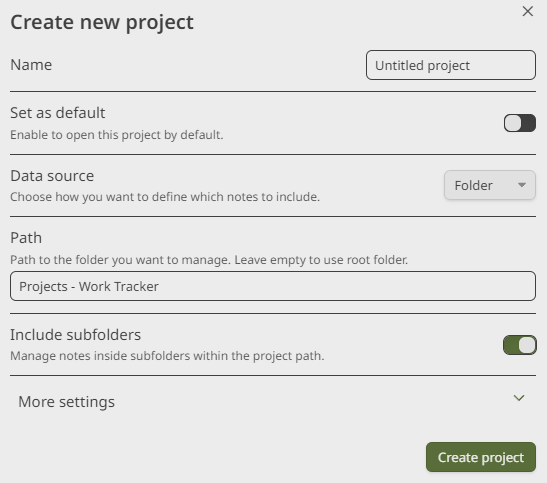
In this case I have chosen the “Projects – Work Tracker” folder and sub-folders as the location to find project related information. When I click Create project, this table appears with notes that previously existed.
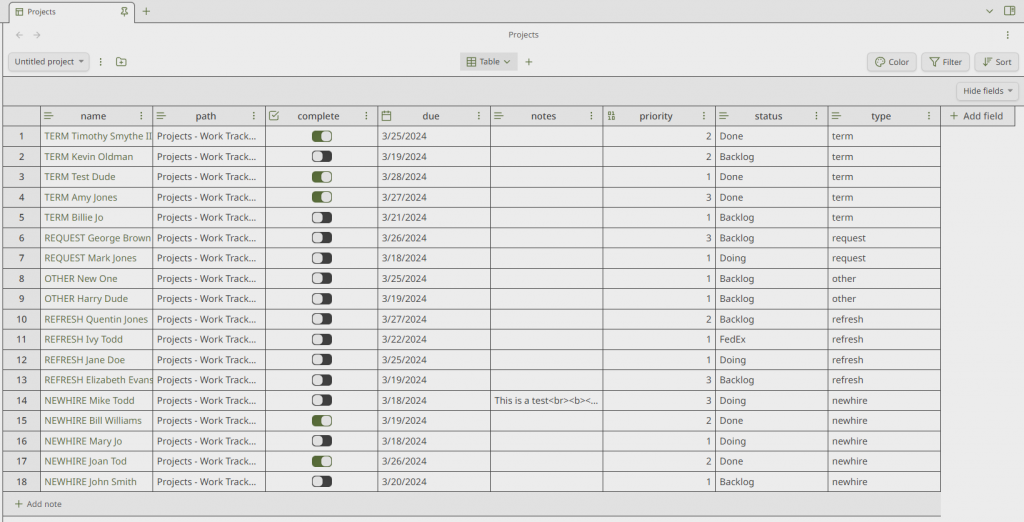
I can add/delete/rename columns as needed. Be aware that rename is safe, but delete is not as it does not have an Undo yet. In the upper right corner are Color, Filter and Sort options. One can quickly add one or more of these to customize what notes (rows) are visible. In my case, I added the following Colors and Sorting:
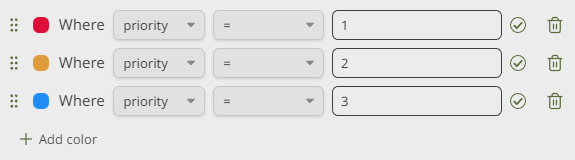
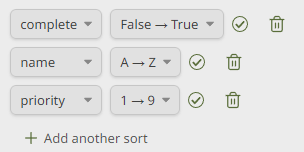
I did not use a Filter for this table as I wanted to see everything. But, it is sorted with completed items at the bottom (in case I need to reopen an item) and they are sorted by title or name and priority. The colors are not required but just jazzes it up a bit.
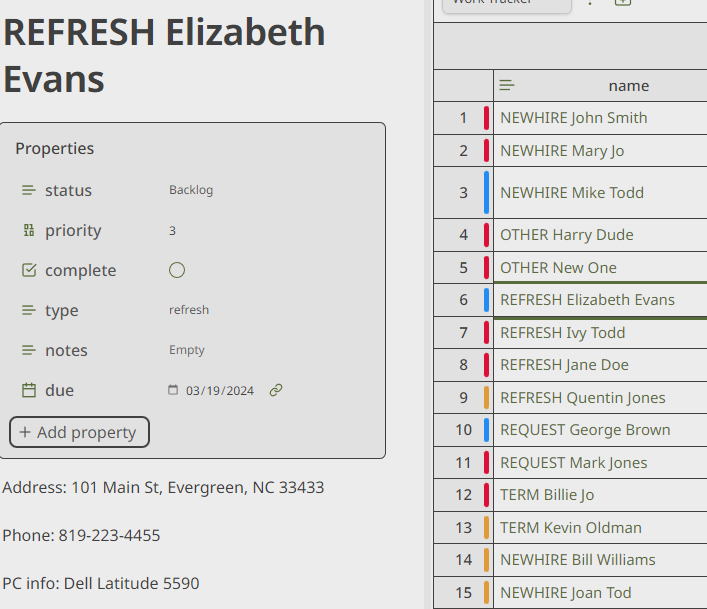
You can see at the bottom of the table view there is an “Add note” to enter more items and at the far right an “Add field” to create more columns. Clicking on the name will open up the corresponding note. [These are made up names. 🙂]
The Projects plugin allows for four different views: 1) Table, 2) ‘Kanban’ Board, 3) Calendar and 4) Gallery. I am using the first three views. The last one is more cutesy and allows a picture to be attached to each note. It is better used for those needing to track YouTube or Blog posts and is something I may utilize later on.
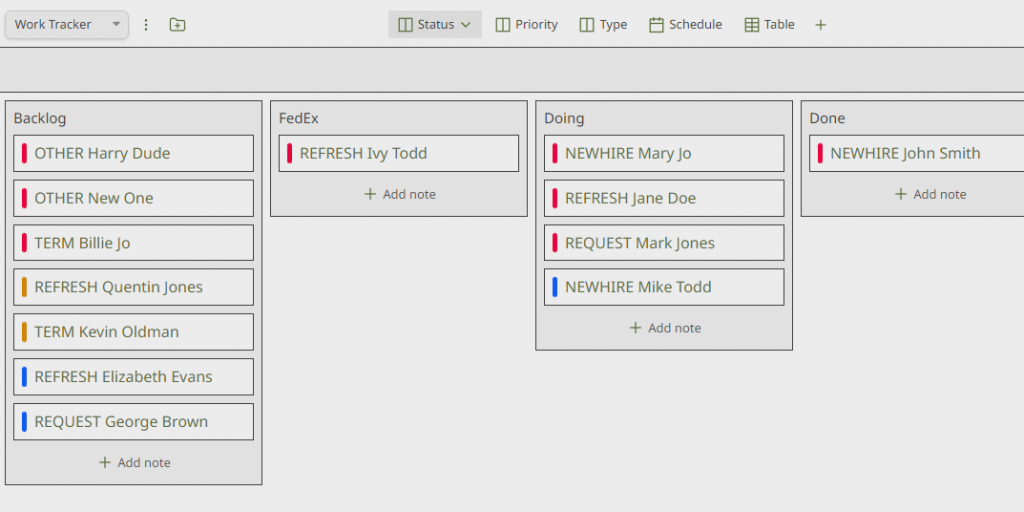
I created three Kanban boards. The first one tracks by the status of the work: Backlog, Doing, Done and FedEx as shown below. Dragging items to different columns automatically updates their statuses. FedEx could just be called Shipped or In Transit, which is work that will be complete once the user receives their equipment.
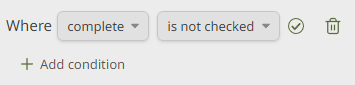
I have used a similar set of colors and added a Filter because when items are completed, I no longer need to see them here.
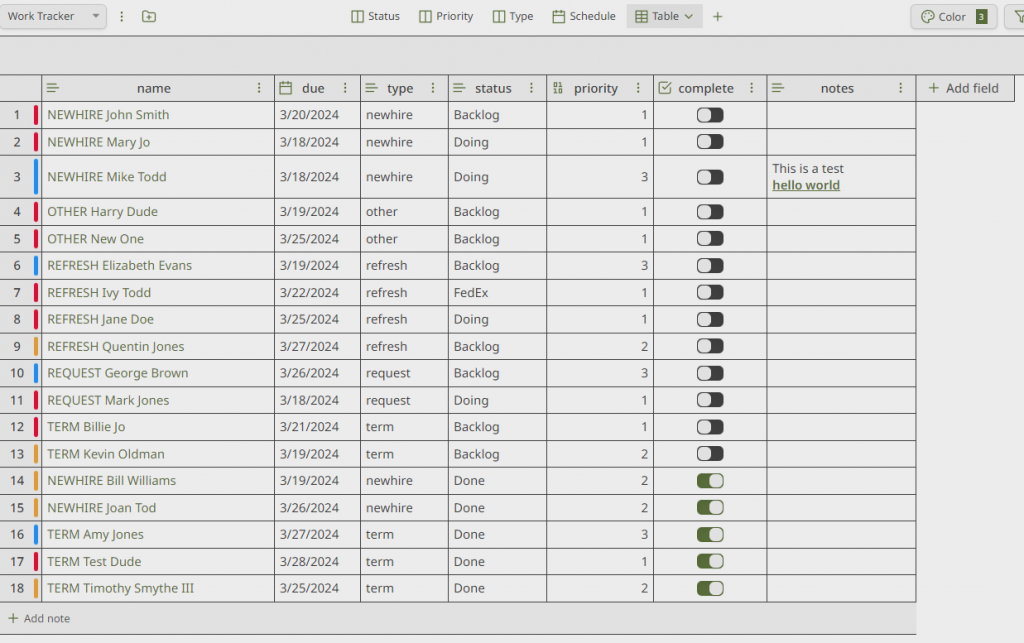
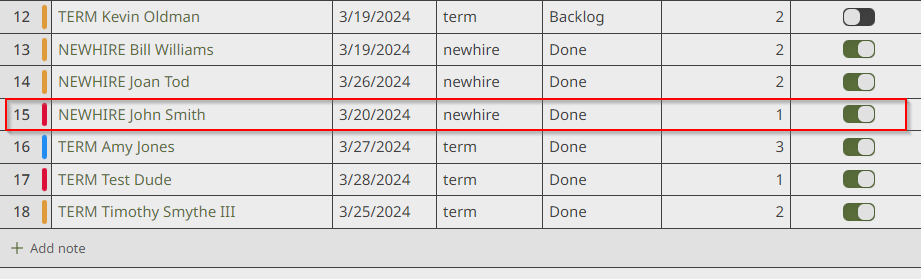
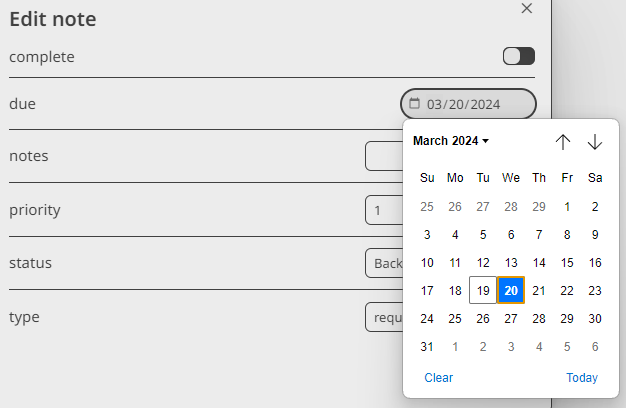
The item in the Done column is only there because its complete value is not set to true. I can do that two ways, either from the table or the calendar view. In the table view, I find the item then click on the complete to toggle it to true. But, first, let’s look at the calendar view.

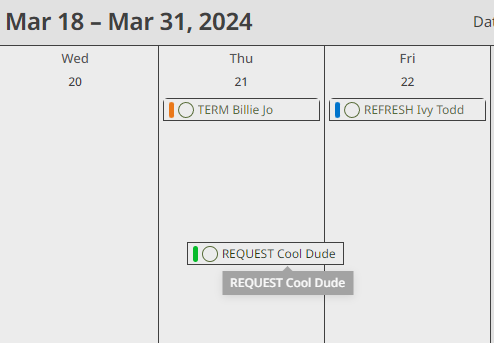
Here we see similar color markup and items sorted by name. Notice each item has a checkbox. When that is checked, the item disappears from the calendar and from the Kanban board views. Let’s click on John Smith’s checkbox under Wed March 20th and see what happens.

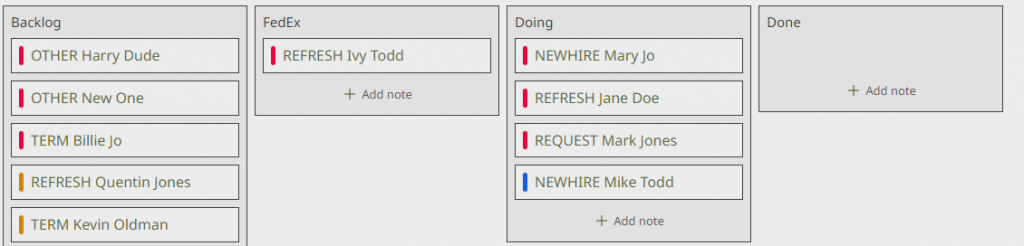
Yes, John Smith no longer shows up in the Kanban or calendar views. He does appear in the table view, just in case I clicked his entry by mistake. This enables me to undo a mistake.
Since any view can be quickly duplicated, one can create more with different filters and sorts. For Kanban board, we can easily change the Status field upon which its columns (lanes) are based. Below are two more boards based on Priority and on Type:
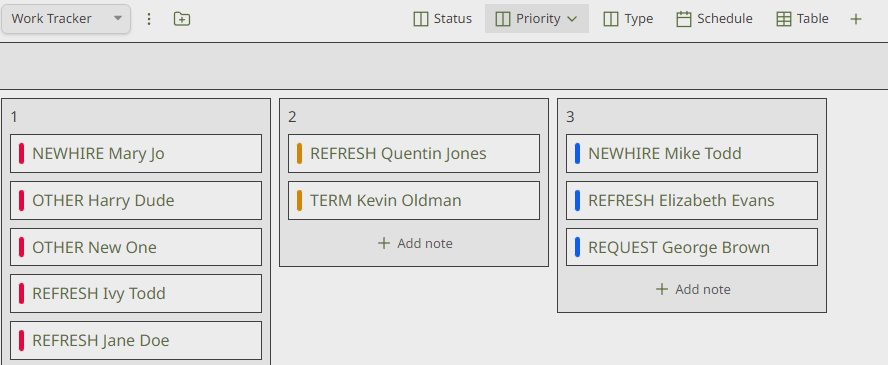

As you can see, the Kanban columns expand and contract as needed. I don’t really have to create more of those as I can just change the Status field back and forth. But, it is convenient.

Picking a different field from the Status list will immediately reformat the current Kanban board.
Now that we have seen how to interact with the different Projects views, let’s look at a way to automate some of the text entry when creating new notes.
Obsidian has a builtin Templates system, which is quite helpful. If you are creating notes for specific types of projects, tracking video production, blog articles, etc. you can save time by creating templates for each one. The Daily Notes plugin allows one to use a standard note upon starting the each day. For other types of notes, users can press Command or Control P and type in template to see these options:
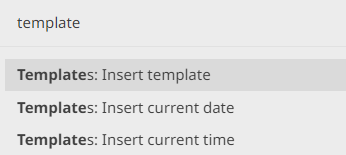
Clicking on Insert template shows me this. Choosing one of these will just plop in that template’s text into the active note.
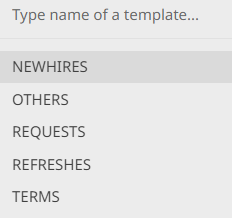
This is quite helpful, but, a more powerful plugin called Templater is even smarter as it can choose the template based on the folder new notes are created in.
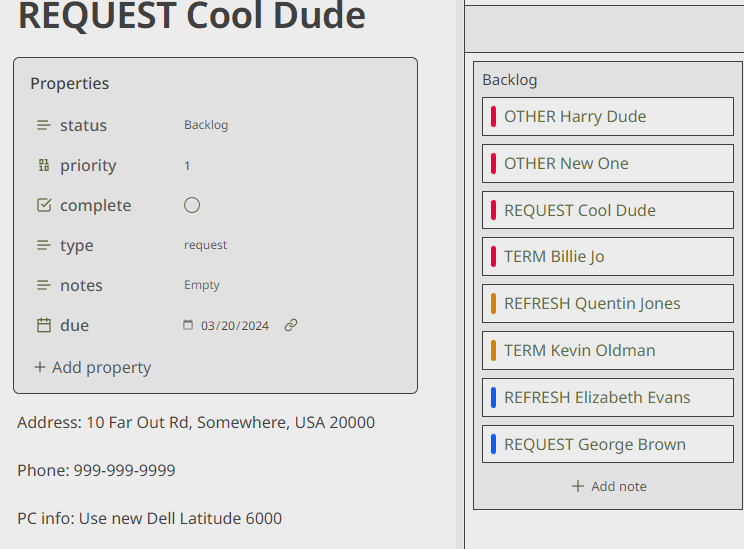
Let’s say a manager is requesting a laptop for one of his staff, Cool Dude. In the Templates folder, I have created a template called REQUESTS which looks like this:
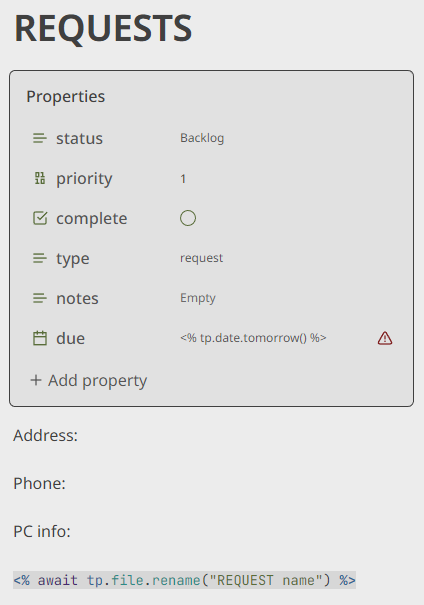
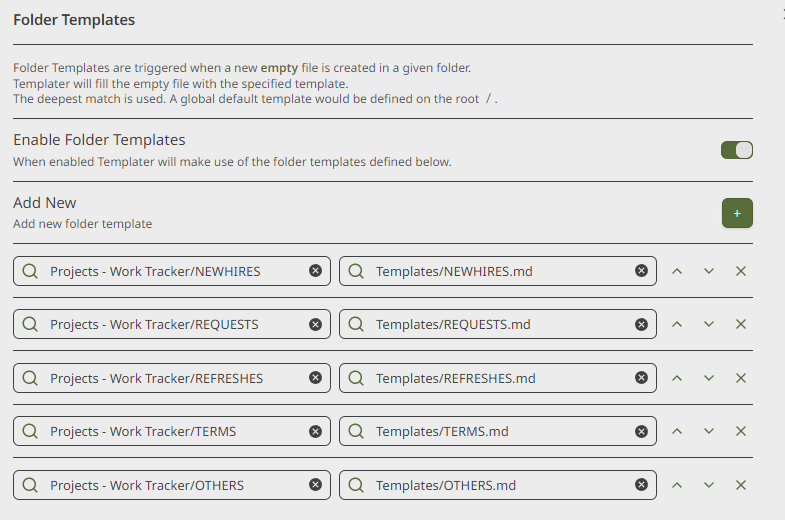
At the top of each note are its properties which are variables required to run Projects. The message next to the due date is there because it is a date value and it contains text instead. But, never fear because it is a Templater function that retrieves tomorrow’s date. When Templater runs, it will replace that with the actual date value. At the bottom is a command to rename this note to REQUEST name. This puts the cursor at the top of the new note and allows one to add the name of the user. To enable the automatic text insertion, each folder needs to be set to use a certain template as shown below:
Once this is all in place, I simply right click on the REQUESTS folder and choose New note.
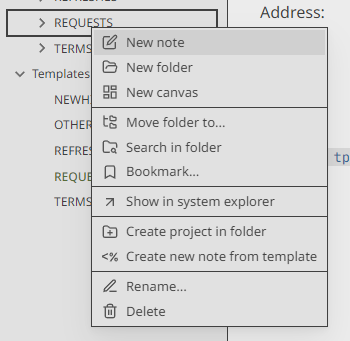
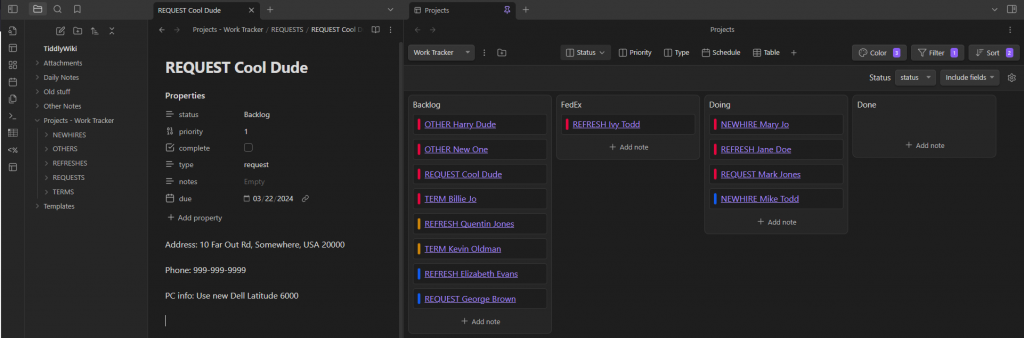
Then the magic happens and we see this new note:
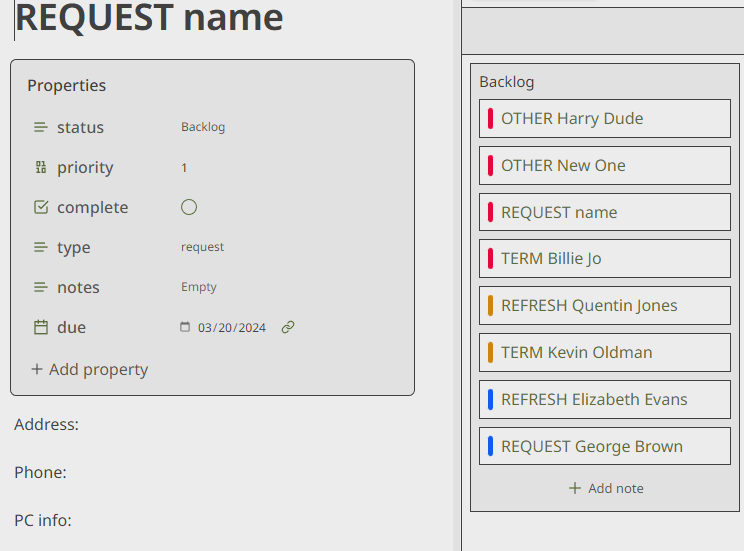
The note already appears in the Backlog column in the Kanban board. Now we simply enter the user’s name and other information and we are done.
I can set a due date in the note or click on the Kanban entry or move the item around in the calendar view.
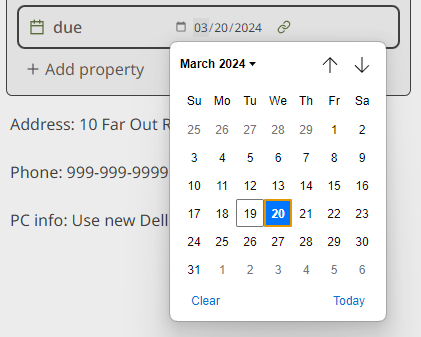
I used the calendar to change it to Friday the 22nd.

I can also set a priority if needed. Now we are all set to work on the setup of Cool Dude’s laptop. In the same manner, notes can be created for the other types of work and Templater will do its thing.
What we see from this exercise is a pretty low friction workflow. The creation of new work items is very quick and standardized. They appear in all the right places in the Kanban, Calendar and Table views. If more types of work come along or more statuses are required, they are simply added and the views update automatically. So, we’re not locked into one particular workflow.
In the Part 2 article, using the Canvas as a dashboard would require rework every time a new status or type of work was added, and we also no longer see items once they are marked completed. But, we can get back to them from the table view if required.
For those who like dark themes, as I do, Obsidian has many downloadable themes. The default dark theme is below.
This whole set of folders/files is called a Vault and can be named anything you like. It can be stored locally, in Dropbox, OneDrive, etc. I use a program mentioned in a previous article, DIY “mission critical” file backups, called Syncthing, to keep my main PC and mobile phone Vaults synchronized. It works very well once you get the hang of configuring it. I have tried updating a Vault from a shared PC as well and that seems to work okay. So, using Obsidian over a regular network is doable as far as I know. I just wouldn’t recommend more than one user updating the same note at the same time.
The required plugins for this setup are:
- Daily Notes (core)
- Templates (core)
- Dataview (community)
- Projects (community)
- Templater (community)
I hope this have been helpful and you will find time to check out Obsidian’s ability to track work on just about any type of project you may have. Keep in mind that Obsidian is one of a very few applications that runs on both mobile and PC devices. There are similar web only applications but they are all paid services. For non-profits or single business owners, Obsidian is free. In a commercial environment it is $50 a year. They do have their own Sync service at $8/month.
Cheers…